General.
Focus blending is used to increase depth of field (DOF). This is particularly useful in two circumstances - macro photography where Camera/Lens DOF is very shallow, and in landscape photography where you want the foreground and background to be in clear focus, independent of the camera aperture and lens focal length (Ansel Adams effect). Focus stacking technique involves taking a sequence of pictures, each with slightly different focus, then combining these pictures, and blending them, to form a single image with the DOF extending across the range of focusses. There are a number of software techniques to achieve this effect - CS5, Helicon Focus, Photoacute, etc.
Stacking can be used for a number of benefits in addition to focus blending. Combining multiple (static) images and blending them can lower noise and improve dynamic range. This is particularly useful for the Nikon 1 series since the camera can support rapid burst rates (up to 60fps) and also has shitty shadow noise so any improvement is welcome. Go to (stacking) for more information.
Focus Blending in Photoshop CS5 (Macro)
- Take a series of pictures of the subject at focus ranges which cover the entire range of desired sharpness of the subject.
a.Use a tripod if possible
b.Use manual exposure
c.Shoot at “optimum” aperture for the lens used
d.In my case I use a D700, nikon 24-70mm f/2.8 at 70mm, f/8
e.I use the Canon 500D close up lens attachment (cool device)
f.Shoot in RAW and import into Lightroom

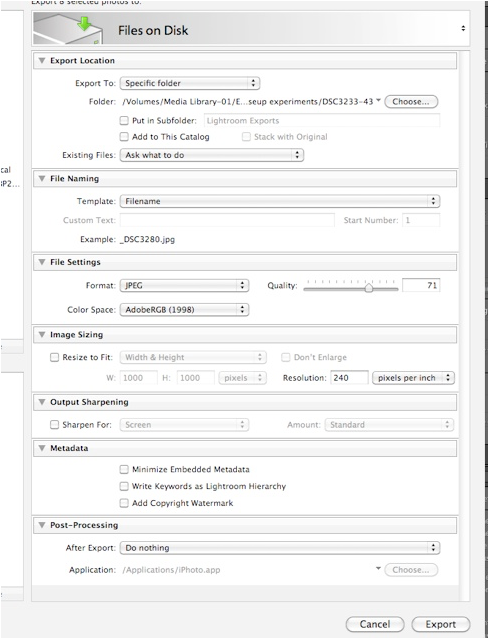
2.For a “quick and dirty” process, convert everything to jpeg. This will make things go quicker.
3.Select all images in sequence (see above) and export to jpeg
4.Open CS5 and select Files -> Scripts -> Load Files Into Stack . .
5.Select Files and make sure “Attempt to Automatically Align Source Images” is checked
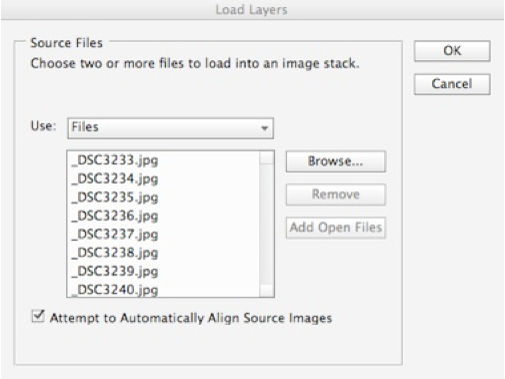
6.Photoshop will load the images into a multi-layer stack
7.Select all the layers and select Edit -> Auto Blend Layers
8.Select “Stack Images” and wait for Photoshop to perform the blending. The resulting image should show the increased and blended depth of field. Flatten the image and save.
9.Re-import into Lightroom
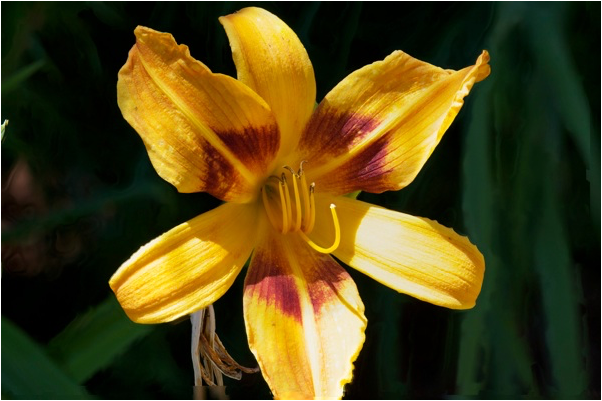

The above picture sequence was done handheld and with a slight breeze. As a result the flower moved around a bit. CS5 did a fine job at aligning the image sequence but there are still a few artifacts such as the right side of the lower petal. This can be corrected in Photoshop if desired.
That’s how you do it in Photoshop CS5. Of course, you could also do it with RAW or TIFF files and get higher quality. However, processing time would be much longer.
Note. I tried Helicon Focus and PhotoAcute with less than satisfactory results. Photoshop CS5 has a much superior alignment algorithm and is better able to deal with hand-held movement as well as movement of the main subject. If I feel the need to use either of these apps, with hand-held images, you can do the “Load Files Into Stack” thing with “Align source images . .” checked. You can then create individual files from each layer of the stack that are aligned. These files can be then used in other apps without need for further alignment.
File -> Scripts -> Export Layers to Files . .